


One of the best ways to improve the beauty and usability of your home is to install pavers outdoors. Whether you want a beautiful patio, walkway, or driveway, proper preparation will ensure that the project will look good and last a long time. Knowing how to prepare your landscaping for paver installation ensures your investment stands the test of time, resists shifting, and maintains its aesthetic appeal.
In this blog, we’ll explore the essential steps for paver installation preparation, including tips on landscape preparation for pavers, site levelling, and how to properly prepare your yard before the installation process begins.
Why Proper Preparation Is Crucial
Before beginning the installation of brick pavers, it is crucial to understand site preparation. Without proper site preparation, even the most attractive pavers will settle unevenly, causing potential trip hazards, drainage problems, or other issues. Proper site preparation will provide you with:
- A solid foundation that prevents pavers from sinking or shifting over time.
- Efficient water drainage reduces the risk of pooling or erosion.
- Long-term durability, minimizing maintenance and repair needs.
- A smooth, professional appearance that enhances your property’s value.
If you want professional assistance, reaching out to an expert paver contractor can make a big difference in getting the job done right.
Step 1: Plan Your Design and Layout
Before breaking ground, start with a clear plan. Decide the location, size, and shape of the paved area. Consider how it will blend with your landscape design and home’s architecture. Mark the area using stakes and string or spray paint to visualize the layout.
When installing driveway pavers, ensure you account for the vehicle load and turning space. For patios and walkways, think about flow, access points, and aesthetics. A reliable pavers company can help you choose suitable paver types and design patterns that align with your goals.
Step 2: Assess and Clear the Area
Then, evaluate your yard as it currently stands. You will also need to clear the area where the pavers will be laid of any existing materials, including grass, plants, concrete, or debris. You can use a shovel, sod cutter, or excavator, depending on the size of your yard.
When preparing landscaping for paver installation, ensure the surface is free from roots or organic material that could decay and cause the pavers to settle unevenly. This step creates a clean canvas for accurate levelling and compaction.
Step 3: Determine the Proper Depth
This depth accommodates the paver thickness, sand bedding layer, and the densely compacted base material. Keep in mind, the objective is to have the finished surface slightly higher than ground level and allow for drainage.
This depth accommodates the paver thickness, sand bedding layer, and the compacted base material. Remember, the goal is to ensure the finished surface sits slightly above ground level, allowing for proper drainage.
Professional brick paver contractors can assess your site and recommend the appropriate excavation depth, taking into account the soil type and load-bearing requirements.
Step 4: Create a Solid Base
The foundation is the most critical part of any landscape preparation for pavers. Start by filling the excavated area with a layer of crushed stone or gravel, typically 4 to 6 inches deep. This material allows for proper drainage while providing structural stability.
Compact the base material using a plate compactor to eliminate air pockets and ensure an even surface. This step may need to be repeated multiple times, especially for driveways that bear heavy loads.
Tip: Sloping the base about 1 inch for every 4 to 8 feet ensures water runs off the surface and doesn’t pool on the pavers.
Step 5: Add and Level the Sand Layer
After compacting the gravel base, spread a 1-inch layer of coarse sand over it. This sand serves as a bedding layer, allowing the pavers to settle evenly. Use a screed board to level the sand precisely, ensuring consistent thickness.
Avoid walking on the sand once levelled—footprints or uneven areas can disrupt the smooth surface needed for proper paver placement.
Step 6: Lay the Pavers
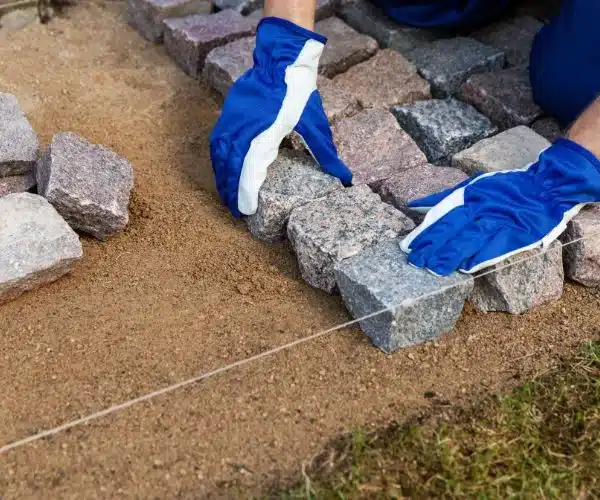
Now comes the exciting part—placing your pavers! Start from one corner and work outward, following your chosen pattern. Use a consistent spacing between pavers (typically 1/8 inch) to allow for the insertion of joint sand.
Tap each paver gently into place with a rubber mallet to ensure stability and uniform alignment. Regularly check that rows remain straight and the pattern flows correctly.
Working with a professional pavers company ensures precision and helps you avoid common mistakes that can affect the final look.
Step 7: Fill the Joints and Compact Again
Once all pavers are set, spread fine sand (polymeric or jointing sand) across the surface to fill the gaps. Sweep the sand into the joints until filled.
Next, use the plate compactor again to settle the pavers firmly into the bedding sand. Repeat the sanding process to fill any remaining gaps, ensuring a tight and stable surface.
Step 8: Edge Restraints and Finishing Touches
Edge restraints are essential for maintaining the integrity of your paved area. These are installed along the borders to prevent pavers from shifting or spreading over time. You can use plastic, concrete, or metal edge restraints, depending on the specific project requirements.
Finally, clean the surface and remove any excess sand. Consider sealing the pavers for added protection against stains, fading, and weather damage.
Tips for a Smooth Installation
Here are a few expert recommendations for effective paver installation preparation:
- Check Drainage: Ensure that water flows away from your home and surrounding structures. Poor drainage can lead to erosion and long-term damage.
- Use Quality Materials: Always invest in high-quality pavers and base materials for durability.
- Hire Professionals: A skilled paver contractor ensures precise installation and long-lasting results.
- Maintain Regularly: Sweep debris, clean stains, and reseal as needed to preserve beauty and functionality.
Why Hire Professional Paver Installers
While DIY installation may seem tempting, paver projects require careful attention to detail, specialized tools, and technical knowledge. Professional brick paver contractors ensure:
- Accurate excavation and compaction for a stable foundation.
- Proper slope and drainage planning.
- Precision cutting and fitting for a flawless finish.
- Long-term durability and aesthetic appeal.
By hiring an experienced paver contractor, you save time, reduce errors, and guarantee a professional-grade result that enhances your property’s curb appeal.
Conclusion
Adequate preparation for installing pavers will be the first stage to success. Understanding how to fix up your yard in order to complete the required steps- excavation, base compaction, leveling – will create a solid, attractive surface. Preparing your landscaping will pay off with a patio, walkway, or driveway. Taking a little time to prepare your landscaping will be worth it in the end.If you’re looking for experts who can handle every step with precision, consider reaching out to a trusted paver company like CC Brick Pavers. From site preparation for brick pavers to design and installation, their professional paver services ensure your outdoor space is built to last and look stunning for years to come.